Showing posts with label projects. Show all posts

Tuesday, November 23, 2010

paper building blocks

Okay, so we needed to do something especially fun for Micah, so picked a pre-school project that we hadn't done in a long, long time (which ended up being him watch in fascination as Levi and I constructed nearly a dozen of these for him). 

For each block you will need: 2 bags & markers to decorate & a bunch of newspaper.
Wad up the newspaper and stuff one bag.  Decorate the other, any way you like, and then slide it over the stuffed bag.  Voila! 


Our favorite bags are the Sir Punzel tower, the one made to look like our house, and the reversable bag, which has the building fine on one side and on fire on the other, so the firefighters can actually put the fire out!

When we're done with them, we're going to throw them in our fire pit, for a quick burst of warmth!


Monday, June 1, 2009

Day One : No TV Experiment

So here's some pics of our No TV experiment, Day One. There was some screaming on M's part, and some failed negotiating on L's part, but they got over it rather quickly. The secret to our success was going cold turkey - I simply hid all the DVD's. See? (God forgive me for the lie) There not here - who knows where they are? Maybe they've all gone on vacation?
Anyways, they went out like lights at the normal bedtime. I guess all that extra activity and time spent actually using their brains wore them out.
Don't get me wrong. TV can be a great learning tool! And we control what they're watching by limiting our viewing to DVD's. Just a few too many sick days and after that I felt like all we were doing was watching that silly box. And all the things that they weren't doing, well that's what made me say let's see how we can do without it!

And here's our letter L project for the day - Lions! L's is on the left, and M's is on the right!

Friday, May 29, 2009

Run, Run...

Run, run, fast as you can.... I brought home a bunch of nursery rhyme books the other day, and after we'd read The Gingerbread Boy, by Paul Galdone (which I didn't exactly follow his words, I kept saying the rhyming bits the way I remember them from kindergarten!), we made some gingerbread men.
L helped me mix the dough while M was out with Daddy, and after the dough had chilled, both boys helped roll it and cut the men out, and then decorated them. Our gingerbread men went the way of all gingerbread men - down somebody's throat - and so there are no pics of the finished project, but gosh were they yummy!

Thursday, May 28, 2009

Oops!

Oops! I realized the other week that I totally and completely forgot to send something fun to my girlfriend back home when she had her baby. I think this occured to me when I was posting a picture of the little pirate lass from our last trip to Ft. Pierce. She and her mother and sisters made a big deal over my first pregnancy, so I couldn't let this go! I doubt very highly that she reads this blog, so I thought I'd show off what I've been up to lately!
I made her little girl a couple of bubble suit jumper thing-a-ma-jigs, and a bonnet. I'm going to use the extra fabric to make a couple of these and put them in my shop too...
They seem like just the right thing for summer (or really most of the year where this kid lives), so hopefully they'll fit okay, and she won't mind the ribbons! The pattern I used for the first one was okay, but I felt like it left a good bit of room for improvement, so I altered a few things for the second one, and was really happy with it (not only was my way a bit neater, it was also easier - go figure)!

Monday, May 18, 2009

Ice Cream!

Oh, my gosh. We finished the letter I off by making some ice cream in a bag!
It was sooo easy, and we had a blast! I'll include the recipe we used at the bottom of this post. I was floored by how good this stuff was! We tossed it around for 15 minutes, and they had no idea what Mama was up to, other than the fact that we had dumped sugar and milk and cream and vanilla in a bag and were getting to throw it around! When we opened it up they totally freaked to find ice cream!


For the ice cream:
  • 1/4 cup sugar
  • 1/2 cup milk
  • 1/2 cup heavy cream (whipping)
  • 1/4 tsp vanilla (we just use a capful)

Other supplies:

  • 1/2 cup salt (table or rock)
  • 2 cups crushed ice
  • 2 small ziplock bags
  • 2 big ziplock bags
  • kitchen towel
  • cups & spoons to eat with
  1. Dump the sugar, vanilla, cream and milk in one of the small ziplock bags. Seal it tight, then put it in the other small baggie and zip that tight too (just to make sure it doesn't pop open and get all salty & icy).
  2. Put the salt & ice into one of the big bags, alone with your baggie of future yummy goodness. Seal this tight. Wrap the whole thing in the kitchen towel, and put it into the last big bag and seal that too (salt lowers the freezing point of ice, and the towel will help keep little hands from freezing).
  3. Set a bell for 15 minutes. Rock, roll, toss the bag, play catch, whatever - just remember that it is a plastic baggie, so dont be too tough on it. After a while the ice will start to get all slushy, and just around the 15 minute mark your little bag of goodies will feel like a nice, firm lump in the middle of that towel.
  4. Take out your bag, serve and enjoy!

I couldn't believe how easy, fun and yummy this project was! We will definately be doing it again! Oh, and this made enough for me and the two boys to each have some. It was really rich, so we got plenty!

Thursday, April 30, 2009

Caterpillar!

Here's L's caterpillar he made at OT. He was very proud of it!

Monday, April 13, 2009

Oh Chickens, Please Come Out

“Oh chickens, please come out.”
“Don’t be scared. I’m Levi. I’m not a scary Levi.”

While waiting we had a picnic!

And then, while those first four pictures were loading, believe it or not, a chick hatched!L was freaking out, and M sucked in his breath, his little mouth hanging open. This is, hands-down, my favorite science project in a loooonnnnggg time!
Tomorrow we'll be back with Easter and Birthday Pictures! Can you believe M is TWO!?!

Sunday, March 29, 2009

Sunday Greetings

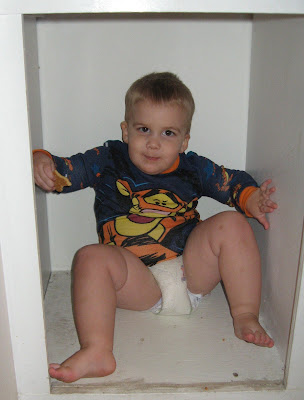
It never fails: the second you pack up the camera the kids get cute. Here is M with his growing, I'm-almost-2, confidence. Doing what he is not supposed to be doing.

And he emptied the toys out of one cabinet, and then suddenly realized that he would most definately fit into this wonderful nook.

And then he realized there was a photo-session going on and insisted on another shot...
So, today, L has literally been at the kitchen table for an hour and forty minutes, cutting and gluing and pasting. Here he is with Mr. Brian, showing him his on-going project and quickly inlisting Brian's help.
Isn't it great when you find a project you can really lose yourself in?

Thursday, February 26, 2009

Dinosaur Egg Tutorial

So for our study of the Letter E I thought it would be fun to make Eggs. You could put anything that hatches in yours, but we used dinosaurs. Be sneaky - I slipped our baby dinosaurs into their eggs in the wee hours of the morning, once the eggs were totally dry. Anywho...

You will need:
- newspaper (rip it into smallish pieces)
- 1/4 cup flour
- 5 cups water
- one balloon for each egg
- a pot (for heating the paste in)
- tape
- bits of string
1. Make your paste. This recipe makes more than enough for several eggs. Mix the flour and water in your pot until flour is disolved. Slowly heat the mixture on your stove top (a grown-up's job). The paste will be very watery. Allow to cool before using (No heat option: just use more flour and warm water).
2. Inflate your balloon to an egg-ish shape. Knot the end and tape it to the table.
3. You can let your kids dip straight out of the (cooled) pot, or you can give them small bowls of it. Whatever works for you. Show them how to dip a piece of the newspaper and then slide it between their fingers so the extra-paste runs off.

4. Stick the wet paper to your balloon. Continue dipping and sticking, overlapping the paper until the balloon is nearly covered. There should be a small opening at the bottom (you will need this to sneak your hatchling into later).

Little ones can have fun with this too, though they will need help finishing!


5. Use your string to hang the eggs up to dry. They will drip! Hang them outside or put something under them to catch the mess. This will take a lonnnnggg time to dry.

6. When the eggs are dry you can put a second layer on them if you want to. Just make sure the thing is solid so paint doesn't leak through to your hatchling. Course, if you make it too solid you may end up needing a baseball bat to get it open... When it's totally dry, pop and remove the balloon. Secretly put in your hatchling and seal the whole with newpaper pieces and paste (you can use regular glue if you pitched the paste while waiting for the eggs to dry).


7. Now it's time to paint! You can do whatever colors you like. Be accurate if you want, or use your kids favorite colors (who knows what color dinosaur eggs were anyways?).

8. Find a safe place for the eggs to dry (leave them on top of the bowls to catch any trips).

Check back tomorrow to see what we did with our eggs!

Monday, February 23, 2009

Fishing on the Brain

One minute my husband is thinking I'm odd, and the next minute he's won over to the weird side, "That is kinda cool." Here's some shots of the finished fish hat I made.


And here's the boys, enjoying a shoe box. Kids are great, aren't they?!


And yay! Nana came for a visit! She came in after they were in bed, so when they woke up in the morning, they were so excited because I had told them she would be here!

Thursday, February 19, 2009

Fun Stuff and Letter E

Well, I've been feeling a bit sick, so we haven't had much to share lately. But here's what we did get shots of over the last few days! Daddy brought home dinner so I wouldn't have to cook. The result is M's new "HHAT!"

M giving me a hope-you-feel-better snuggle...


At some point I had to get some laundry done, right? That's Panda Panda, she's going to be 27 years old this April!


E is for Elephant! M's is on the left, he colored it, but it's so light you can't see. He also smeared on the glue. L's is the purple elephant on the right. He cut out the pieces all by himself and did most of the gluing!

I also somehow managed to finish the maps I was working on - mostly because L asked me to sew him something else, and I wanted to finish these so I could put them in my shop.

Here's what L asked for: a crayon wrap. Well, he calls it a crayon roll. I was flipping through Etsy he saw one and immediately asked me to make him one. It was quick and fun, and a good test run. I think if I ever put any in the shop I'll have to make sure they have a layer of interfacing. But he was really happy with it, and it was great timing since the box is starting to get pretty tattered.
Tada!