We recently received a bunch of books on tape, and I couldn't bear the thought of all those plastic bags being drug around the house, so I got out some scraps of linen and came up with something a bit better to keep them in. You could make the pockets any size, but this worked great for holding 8 books and their tapes:

You will need some fun fabric cut into the following pieces:
(2) liner fabric ~ 13 x 15 inch
(2) outer fabric ~ 13 x 15 inch
(1) handle ~ 3 x 22 inch
(4) pocket strips ~ 4 x 13 inch

Ready? Here we go!
Get out your iron. Fold your handle strip in half. Press. Open it and fold each edge in to the center. Press. Fold it back in half. Press again. Sew around all four edges, about 1/4 inch seam.


Now take all your pocket strips and fold and press the long edges, with about a centimeter for a seam. What happened to the inches? Sorry, but the cm was much more convenient for this one, so just go with it.

Now drop everything, and have a photo session with whichever kiddo who has decided they can't live another minute without your attention...

Ahem. Now grab all your pocket strips and sew down just ONE long edge of each. This is going to be the top edge of your pockets.

Now pick a top pocket, and lay it down, right-side up, on one of your outer bag pieces.

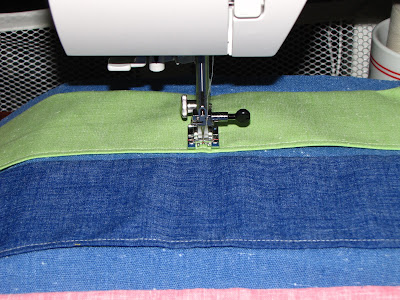
Carefully flip it over. This is where your're going to sew the bottom edge of it. If you like pins, pin the edge down. If you can't stand them (like me), just move the whole thing to the sewing machine, without loosing your place.

Now, stitch in the ditch.

This is what you should end up with...

Now do this with each pocket: position, flip, sew, flip, repeat.


You should end up with four flaps like this...

Flip them all into place, and press. Turn the whole thing so that the top is facing you, and you're about to feed the bottom edge of the pockets into the machine. You are going to sew a line right down the middle of the bag.
(Now, there are two types of people on this planet: the kind that can eye-ball a straight line, and the kind that are terrified by that sort of thing. If you are the latter, you might want to get a pencil/chalk and ruler, and draw your center line before you sew)


Great! Now, line up your two outer pieces, with the pockets (right-sides) together. It's totally fine if the pockets go past the edge - you can trim them later. Sew around three sides of the bag (side, bottom, side) with a 1/2 inch seam. Trim anything sticking out if you need to. Turn bag right side out.

Sew around the same three edges on your liner pieces. Do NOT turn the liner right side out.

Now you have 3 pieces: liner, outer bag, and handle. Line the handle up with the outer bag like this:

And sew both edges of the handle down. The ends will be hidden, which is why they can be raw.

Now, take the bag and handle and put them down inside the liner. The right side of the liner should be touching the right side of the outer bag. Top stitch around the edge, stopping soon enough to leave yourself a 3 inch gap. Be careful not to stitch through the top pocket (because then it won't be a pocket, just an interesting strip of color across your bag)!


No comments:
Post a Comment